Hot kiln alignments, adjustments and inspections
Hot kiln alignments, adjustments and inspections are our key products. The method of kiln alignment in dynamic conditions, developed by our company founder Ph. D. Bolesław Krystowczyk, was the first method of this kind in the World. Even today we still measure and align rotary kilns with the use of this method. We have rendered over 1000 hot kiln alignment services of this type in 42 countries of the World, which reflects the reliability of our hot kiln alignment method. Till this day no other measurement method guarantees a higher accuracy for the measurement of kiln alignment.
SCOPE OF STANDARD HOT KILN ALIGNMENT SERVICE:
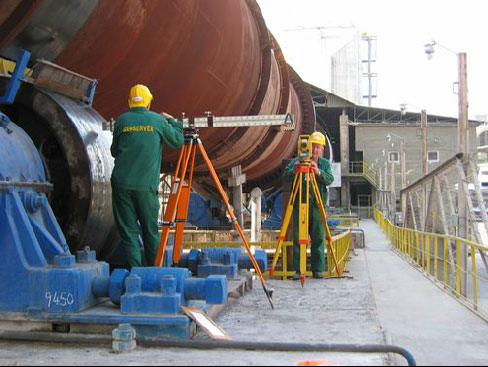
1. Setting up the surveying bases for the kiln: two horizontal reference lines and benchmarks on each pier.
2. Measurement of kiln axis position in horizontal and vertical plane.
3. Measurement of rollers' axis position, rollers' skewing and operating angle.
4. Measurement of rollers' inclination and foundation frame axial slope
5. Measurement of rollers' profiles (mechanical wear of running surface)
6. Measurement of rollers' shaft deflection in reference to the pier (indication of shell crank formation)
7. Measurement of thrust roller position in reference to the kiln axis
8. Measurement of tires and shell temperatures
9. Measurement of tire migration (circumferential tire movement) and calculation of undertire clearance.
10. Measurement of shell profile (circularity deviation and eccentricity of cross sections), preparation of shell polar diagrams and shell 3D animation model
11. Measurement of tires and girth gear wobbling
12. General mechanical inspection of drive mesh, bearings and shafts condition, lubrication efficiency, inlet and outlet sealing, thrust unit, adjustment equipment, covers and housing.
13. Calculations of axial deviations in horizontal and vertical plane and kiln slope
14. Preparation of optimal version of adjustment program and schedule
15. Supervision over adjustment procedure carried out by technicians of the Cement Plant
16. Control survey of final kiln axis position and rollers skewing after the adjustments.
17. Preparation of completed report on measurements and adjustments
18. Preparation of recommendations for future preventive maintenance actions, routines, necessary repairs and replacements.
19. Presentation and submission of the report and shell animation to the Customer
20. OPTIONAL 1: Shelltest - elastic shell deformation survey, shell ovality check
21. OPTIONAL 2: Measurement of kiln drive system geometry: gear, pinion, shafts, reducer, engine (the kiln must be stopped due to safety reasons)
22. OPTIONAL 3: Recalculation of kiln mechanical parameters: current loads on piers, pressure on bearings, Hertz pressures, bending stress in the shell, stress in the tires, calculation of stiffness matrix, optimization of kiln vertical axis position considering load distribution (All results must be treated solely as technical opinion. Geoservex do not take any responsibility for changes in kiln loads or kiln design.)
KILN ALIGNMENT AND THRUST MECHANICAL BALANCE
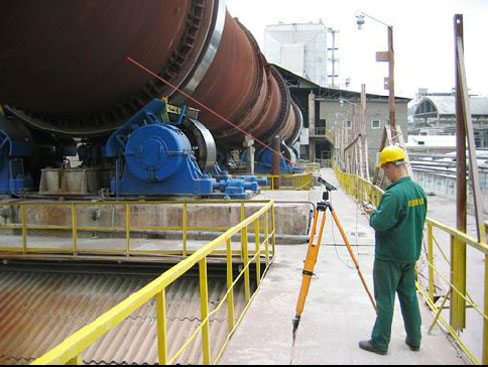
Our hot kiln alignment method enables the precise measurement of such parameters as:
1. kiln axial deviations in horizontal and vertical plane
2. rollers skewing, inclination and profiles
3. roller operating angles
4. under-tire clearances & shell ovality
5. inclination of kiln axis
This set of results is necessary for proper kiln adjustment planning. Base of the results we prepare kiln axis adjustment program and schedule, considering other parameters such as kiln drive mesh, bearings condition, kiln supports load distribution. The kiln adjustment program is discussed with maintenance team of the plant and if accepted the adjustment is done under supervision of Geoservex specialists. The long-term experience of our engineers may be very helpful in performing adjustment activities during normal operation of the kiln.
KILN SHELL PROFILE
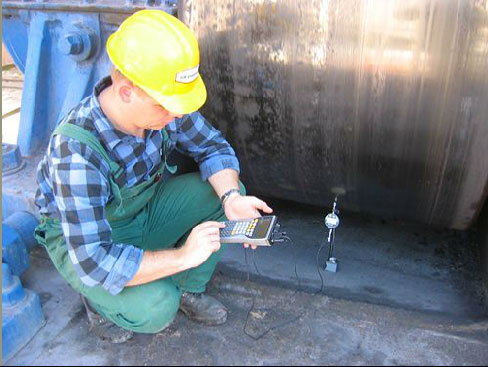
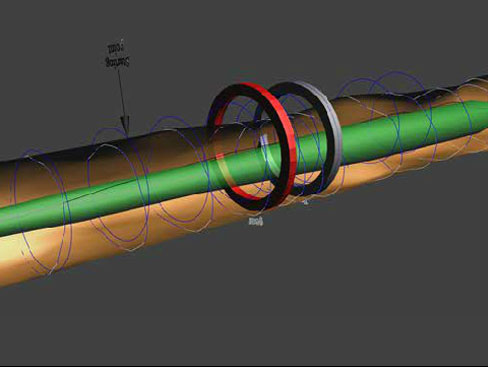
Measurements of rotary kiln shell deformation constitute a significant part of our extensive offer of kiln inspection. Geoservex was the pioneer in the field of these measurements, covering the scope ranging from simple measurements of distance and geometric approximation of a cross-section shape, to linear laser scanning and unique computer software development enabling the calculation of shell eccentricity in a particular cross-section and its shape deformation (circularity). The next step of the development of this service is our newest product - a three-dimensional computer animation of a rotating kiln shell, presenting its measured shape deformations (cross-section eccentricity and circularity deformations). Additionally, this model has been enhanced with a visualization of tyres rotation together with their wobbling (axial unbalance) and radial run-out.
A combination of all the parameters in one virtual graphic model creates a perfect tool to assess the state of the kiln shell, the reason for tyre and drive ring unbalance, as well as to plan repairs, replacement of some parts of the shell, and to plan correction cuts. Moreover, a comparison between the shell deformation and the measurements of support roller shafts deflection enables the detection of mechanical crank formation, and with additional temperature measurements, also of the shell thermal crank formation.
The shell computer animation has been prepared in a way that, despite its advancement, it is easily operated. Therefore, the end product is saved in the PDF format and can be opened and viewed with a popular and free Acrobat Reader 8.
KILN SHELL CRANK INDICATION, TIRE & GEAR WOBBLING, ROLLERS' PROFILES
In rendering our services we focus on a complex approach. In case of measurements of rotary kilns, we have expanded the scope of our measurements by parameters connected with their mechanical condition, i.e.
1. roller shaft deflection (cyclical change of load) 2. tires and girth gear wobbling 3. location of girth gear rotary axis (determination of run-out) 4. mechanical wear and tear of rollers 5. tire and shell temperatures
It enable us to detect symptoms of possible problems such as mechanical or thermal crank formation, high wear of components, kiln drive mesh cyclical changes and many others.
KILN MECHANICAL INSPECTION
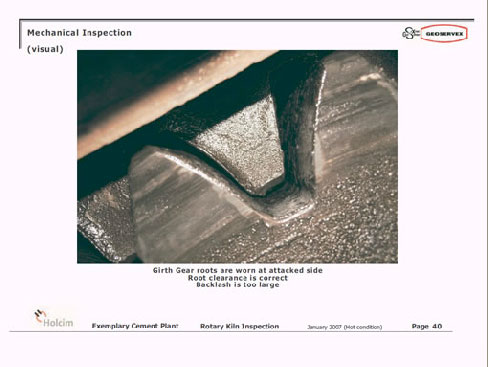
Inspection of meshing of the girth gear and pinion is made by us by means of an innovative method using high definition digital photography, which enables assessment of root clearance, backlash and general root condition without stopping the operation of the kiln. In the same way we report face contact between tire and roller, shimming condition, side guidance and retaining blocks condition, inlet and outlet sealing, kiln shell conditions, foundation frames and others depending on requirements. The final complement is a mechanical survey of the kiln documented in the form of digital photographs with added comments and recommendations. Generated from every kiln measurement is a technical report illustrating measurement results, scope of adjustment, effects of adjustment, technical report and recommendations for the customer. The customer receives the report in hardcopy and on CDROM.
COMPETITIVE ADVANTAGE
Besides the obvious benefits resulting from kiln alignment in dynamic conditions (higher reliability, less emergency standstills, extended useful life of refractory lining and kiln components, lower power consumption of drive [amperage], limiting the problem of hot bearings, etc.) choosing our offer gives additional benefits compared to competitive companies. These include:
• Highest currently achieved accuracy of kiln axis measurements (+/- 0.5 ÷ +/- 1 mm)
• Measurement of roller shaft axis location (geometrically in relation to the actual kiln axis in the vertical and horizontal plane).
• Unique solutions, e.g. measurement of drive meshing during normal operation.
• Detailed laser measurement of kiln shell (radial deformations and eccentricity).
• Preparation of 3D kiln shell deformation model.
• Optimisation of kiln adjustment option for many conditions, sometimes contradictory, taking into account the degree of wear and tear of kiln components.
• Supervision over kiln adjustment (roller dislocation during normal kiln operation).
• Control measurement of the kiln axis after performed adjustment.
• Drawing up a detailed report on performed kiln alignment works with guidelines for the customer and presentation of report with discussing details and possible vagueness in the customer's office.
The scope of performed measurements carried out as part of our kiln alignment services is too extensive to be mentioned here. It is however transparently presented in the exemplary report You can download below.
» Download Exemplary technical report on measurement and alignment of rotary kiln (11,3 MB)
» Download video file 1 (2,7 MB)
